


Team
Members

Kailey Allen
I am a Course 2 junior and am a member of MIT’s Swim and Dive team. I am originally from Washington state.
Eva Anderson
I am a Course 2 junior with an interest in energy. I enjoy canoeing and portaging in Northern Minnesota and Canada, and I am a member of the women’s varsity soccer team here.
Megan Flynn
I am a 2A-6 junior interested in robotics and controls. I’m originally from New Jersey and play varsity field hockey for MIT.
Hannah Mahaffey
I am a course 2 junior interested in manufacturing. I love MIT swim & dive, Baker House, farms, and pasta.
Rob Silvestri
I am a course 2 junior from NY. My favorite DJ is Alice Wonderland and Im waiting for the Yankees to win the World Series.
Julia Wyatt
I am a 2A-6 junior interested in robotics and sustainable design. I’m on the varsity sailing team at MIT and I love skiing and making breakfast.
Blog 2: Brainstorming
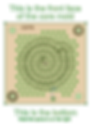
We kicked off our first team meeting with some brainstorming! Here you can see our chart full of ideas and pics for inspiration. We each had 6 votes to use as we narrowed down our design.


After voting, we narrowed down our ideas to 2 popular concepts: a snake and a UFO
Snake
UFO


Areas for creativity with the snake idea include:
-
Yo-yo rattles when used
-
Telescoping tail
-
Tail of snake rattles
-
Tongue moves
-
Snake moves independently of yo-yo body
Areas for creativity with the UFO idea include:
-
Having an alien inside the window
-
Edges light up
-
Alien glows in the dark
-
Yo-yo glows in the dark
Blog 3: Design Review
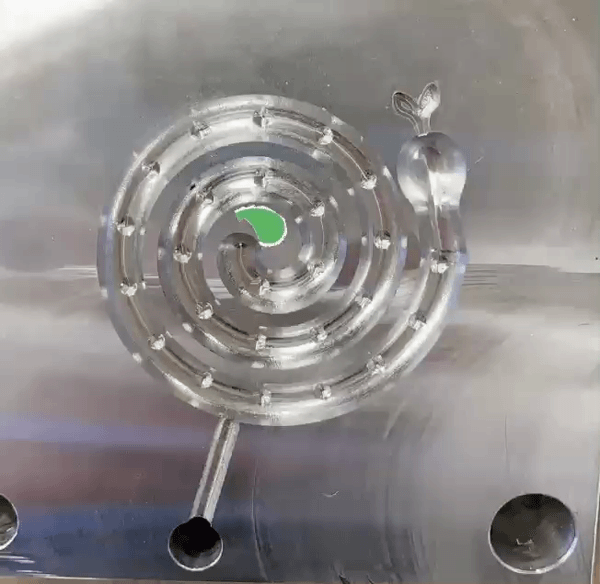
Our overall design concept consists of 4 main components: the yo-yo base, a flat "rock", and 2 snake halves (one side w/ head and one side w/ tail). Additional components include snap on pieces like the snake eyes and tongue. For a special touch, we plan on filling the yo-yo base with beads to create a "rattle" effect. Our initial plans and questions/challenges moving forward are outlined below.
Manufacturing Plan

A big consideration for manufacturing was whether or not we should make both sides of the yo-yo identical. This decision came down to 2 options:
-
One mold for the snake swirl (used for both sides) + mold for snake head + mold for snake tail
-
Mold for snake head side + mold for snake tail side
We decided the snake would have a smoother appearance if the head and tail were in the same mold as the swirl, which led us to choose separate snake molds for the front and back of the yo-yo.
This chart tracks the parts in our current design plan:

Assembly Plan


These cross sections show the layered components of the yo-yo. Notice the cavity in the yo-yo base; this is where we will place beads during the assembly process to achieve the rattling effect.

Challenges
-
We anticipate the 2 snake molds being the most difficult and time consuming to machine. They are more intricate parts (especially the tail) and also are the most important component for aesthetics, so details and finish are crucial.
-
The snake is not perfectly centered on the yo-yo base since it is a spiral, so we 're concerned about this affecting the center of mass of the overall yo-yo.
-
We struggled deciding what component to thermoform. We settled on having a thermoformed rock for the snake to snap on top of, but we're still figuring out how exactly to incorporate this piece as seamlessly as possible.
The assembly process involves 3 main pieces per yo-yo side. The rock fits onto the base and the snake fits onto the rock. Additional assembly steps include addition of our small pieces: the tongue and eyes of the snake.
Assembly will be very similar for both sides of the yo-yo, but only the side with the head will require additional pieces snapped on.


Moving Forward
-
Adjust dimensions for shrinkage based on measurements we can take in lab.
-
We need to formally decide how we're connecting each piece (i.e. where pegs go for snapping snake into place, etc.)
-
Consider if we'd like to add texture to the snake skin.
Blog 4: Final Design
Before we could move forward with finalizing our design, we had to decide on our main feature: the snake. The design review prompted us to give the 3D snake another go. After creating the 3D coiled snake CAD, we evaluated it against our previous design using a pro/con table and a Pugh chart.


Verdict: We decided to move forward with the flatter snake due to primary reasons of:
-
Aesthetic preference
-
Opportunity to pursue texture
-
Manufacturability
Moving forward with the original snake, we started brainstorming different texture ideas, mostly from looking at pictures of cartoon snakes. We narrowed down 3 ideas that we wanted to try and decided to test out the textures on a 3D printed template.
Here is an example of one of the textures on our yo-yo model.


indented triangles
embossed zig-zag
embossed diamonds
Design Updates
-
Pegs were added to the snake with corresponding holes in the yo-yo base
-
Draft angles added to all components
-
Yo-yo base adjusted to accommodate the bearing
-
Snap interference finalized


Mold Progress
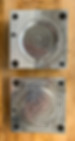
Mold Creation
-
Cavity: Is flat except for a 0.125” diameter cut out of the inside and 0.125” diameter holes for the pegs
-
Core: Has entire body of snake and head. Has a runner based on the specifications given on the lab website.
-
Ejector pin dilemma:
-
Offset the entire design on both molds to line up ejector pins
-
With the snake being in the core, the ejector pins would have to hit it, making the design look less crisp
-
Designed a ring around the snake and a hole in the center for the ejector pins to hit instead
-
Still have questions about the dimensions of the extra ring and hole (don’t want to waste plastic), the dimensions of the plastic lines connected the ring/hole and the snake (strong enough to push the part out but easy to break off), and shrinkage
-


Moving Forward
-
Consider overmolding for different colors
-
potentially use for tail, tongue, and/or texture
-
-
Decide on texture and incorporate into manufacturing plan
-
CAD thermoformed die for the rock component
-
Continue making molds for the injection molded components
-
Purchase beads!
Blog 5: Milestone 1
Lot's of progress has been made since the design review! Here's where we are so far:
Molds Made:
-
Rattle core/cavity
-
Yo-yo base core/cavity
-
Tongue core/cavity
-
Snake (head side) core/cavity
-
Snake (tail side) core/cavity
-
Snap ring core/cavity
-
Rock thermoforming die
Molds Machined:
-
Rattle core
-
Rattle cavity


Miscellaneous Progress:
-
Texture added to snake, based on decision from 3D printed test piece


Blog 6: Progress!


Mold Progress:
Tongue core and cavity machined.
Snap ring core and cavity machined.
Yo-yo base cavity machined.

Injection Molding Progress
Using our completed rattle mold, we injection molded ~40 rattles to test the mold. We then measured the critical dimensions for overmolding the rattles into our snake. We were looking to account for shrinkage, but turns out the rattles fit nice and snug into their mold.

Given the fit of the rattles, we decided not to change the rattle dimensions for the overmolding. We have incorporated the rattle into our snake tail side mold, and we will use the same CAM for the rattle portion to ensure a proper fit.
Thermoforming Progress

3D printed die

First thermoforming attempt

more air holes added led to more definition in the rocks

more holes added plus increased heating and forming time led to high definition in the rocks
Moving Forward
-
Machine snake head side mold
-
Machine snake tail side mold
-
Machine yo-yo base core mold
-
Test tongue mold
-
Test snap ring mold
Blog 7: Milestone 2
Mold Progress:
All molds machined
-
Snake head side
-
Snake tail side
-
yoyo-base
-
snap ring
-
rattle
-
tongue
-
rock thermoforming die

Yo-Yo base
Injection Molding Testing:

Snake Rattle Side

Snake Head side

Tongue

Yo-Yo Base

Snake Rattle Side

Snake Rattle Side Parameters
Assembly Testing:

We measured and cut shoulder bolts to find the right length for our yo-yo base.


We punched holes in the thermoformed rock, fit the snake pegs into the yo-yo base and secured the rock with our snap ring.

With all the pieces assembled, we tested the yo-yo to confirm that the weight and string gap are suitable for functionality.
Here's a gif to honor the vampire weekend album art that gave us our ~inspiration~.
Moving Forward:
Molds
-
Rattles: good to go
-
Tongues: good to go, changes depending on head side cavity mold.
-
Yo-Yo Base: good to go
-
Snap Ring: increase thickness of part, re-machine due to design change and flash defects during injection molding
-
Snake Rattle Side: Modify current core mold; increase depth of pegs
-
Snake Head Side: Solve tongue fit issue for overmolding, re-do CAM and re-machine accordingly
Miscellaneous
-
Decide on a design/color to print for thermoformed rock parts.
-
Decide final colors for each part.
-
Order beads for rattle sound.
-
Start production runs for parts that are good to go!

Flash defect on the snap ring. Adjusting parameters reduced the flash but did not eliminate it entirely.
Blog 8: Production & Final Product

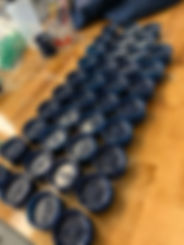

Rattle Production Run
-
Rattle production run went smoothly.
-
The photo below shows the variation in color from the earliest parts compared to the final color.
Snap Ring Production Run
Base Production Run
Head Side Production Run

Tail Side Production Run
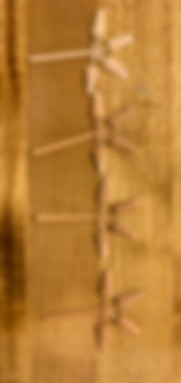
Defects that occurred throughout the production run included:
-
Short shot (examples 1 and 2)
-
Overmolded piece not sticking (example 3)
-
Out of ~150 snakes made, we only experienced 11 defect parts. Parameters were adjusted accordingly (i.e. shot size and cooling time).
Final Yo-Yo

-
Both snake parts were more labor intensive production since overmolding requires placement of a separate part in the mold for each run.
-
The cycle time for 1 snake side was 30s including placement of the rattle and removal of the snake.
-
Removal of the parts proved difficult in the beginning, which could cause deformation of the spiral. However, practicing removal decreased both deformities and cycle time.
.jpeg)


Lessons Learned
-
Design for assembly is crucial! It was difficult to see the peg holes when placing the snake into the yo-yo base since the thermoformed piece caused an obstructed view.
-
Document process parameters for both test and production runs.
-
Do process control! (i.e. create steps to standardize assembly and post processing)
-
This proved useful when drilling holes in our thermoformed piece since placement of the snake needed to be consistent and accurate.
-
-
Dan rocks.